• If this is your first visit, be sure to check out the FAQ by clicking the link above. You may have to register before you can post: click the register link above to proceed. To start viewing messages, select the forum that you want to visit from the selection below.

Announcement

Collapse
No announcement yet.

Wet Sanding, Wondering....

Collapse
X
 
  • Filter
  • Time
  • Show
Clear All
new posts

  • Wet Sanding, Wondering....

    So I use my 1993 White Honda Accord as my test subject when doing different things. A while back I posted a question about the compound drying out extremely fast, and had many great responses for what, how, and why.

    Well my next question is, i wet sanded about half the truck lid and the factory spoiler on it, ( after I clayed of course ) and washed it down really well after the sanding, started at 1500, then 2500, then 3000 grit, and )I know some of you are going to say sanding on a 21 year old paint, are you insane ! Well not a huge concern since I drive it back and forth to work every day). But I sanded very lightly, uniform and crossed with each grit. So from everything i have read and watched i am sure i did a fairly good job. Also the reasoning behind the wet sand was 2 things, 1. paint on this thing is in terrible condition ( bought it like that a year ago and just havent had time for the complete correction ) and 2. I really wanted to try the wet sanding.

    So here is what I did:

    Washed the trunk lid, and spoiler

    Clayed trunk lid and spoiler

    Sanded 1500 , 2500 , 3000

    Washed again

    Meguiars D/A paired with the Microfiber Cutting Disc and D300.


    The way it turned out, my jaw dropped! I figured i would have "screwed" something up with doing this, but it came out crystal clear and flawless except the deeper scratches that i was not going to try to sand out because I knew there was just no way for those nasty things to come out.

    So now the Question,

    Why is it that the compounding process lasted so much longer this time VS being non-wet sanded and the compound drying out in the matter of seconds.

    I have been thinking about it a lot lately and I think i know the answer but want to ask it. I was thinking that i possible knocked out the "dry stuff / Oxidation" out when the wet sanding was going on. But I am not the professional here, and first time I touched paint with sand paper. I will try to get some pictures of what the area looked like prior, i saved one spot that i didnt compound yet, so still have the sanding marks, and the outcome.

    Thanks for the help

    Joel

  • #2
    Re: Wet Sanding, Wondering....

    Take into account temperature and humidity. The environment plays a role in how compounds/polishes and waxes behave.
    99 Grand Prix
    02 Camaro SS

    Comment


    • #3
      Re: Wet Sanding, Wondering....

      Oxidized paint is Dry

      Sometimes feeding I with #7 before compounding helps

      Comment


      • #4
        Re: Wet Sanding, Wondering....

        Originally posted by J4o2el7 View Post
        I was thinking that i possible knocked out the "dry stuff / Oxidation" out when the wet sanding was going on.
        Originally posted by The Guz View Post
        Take into account temperature and humidity. The environment plays a role in how compounds/polishes and waxes behave.
        Both of the above are contributing factors here, and most likely a combination of the two were at play.

        We have to ask though, did you experience a short buffing cycle with D300 on this car previously, Joel? If so, that's really odd as D300 will usually stay wet for a very long period of time, and we've even seen it used on black paint in direct sunlight where the paint was so hot it was painful to touch - and D300 stayed wet for a long time. It could very well be that the surface of the paint was badly oxidized and "fractured", which essentially creates very large pores on the surface that can negatively impact a compound's performance.

        Now, with regard to your sanding process: it sure sounds as though you gave this very careful consideration before starting, and that your technique was quite good. You might be surprised, however, at just how effective 3000 grit is all by itself when it comes to removing more severe defects, oxidation, etc. If you're going to continue experimenting on this vehicle, you might want to try that on the next section. If the paint is bad enough and 3000 won't cut it (no pun intended!) then maybe try starting with 2000 grit. When we preach "use the least aggressive method to get the job done", this is really when we stress it big time. Wet sanding can take off a heck of a lot more material, and much faster, than compounding will. But when done right, in many ways it can actually be safer than aggressive compounding.
        Michael Stoops
        Senior Global Product & Training Specialist | Meguiar's Inc.

        Remember, this hobby is supposed to be your therapy, not the reason you need therapy.

        Comment


        • #5
          Re: Wet Sanding, Wondering....

          I agree with you 100% that the D300 is a long lasting compound, I have used in direct sunlight on a hot day and it lasted a while, I did use the D300 prior and it dried really quick, thats why I was assuming that the sanding knocked down some oxidation and it lasted much longer this time, then the prior attempt. As far as the different days that Itried the D300, the first day I tried it out was on a mild day, maybe 65 degrees, after the sanding and then using the D300 it was about 80-85.

          As far as the sanding, I will keep that in mind starting at a higher grit instead of starting at a lower more agressive. I say its in bad shape becuase of the oxidation (but I am sure that there are swirls under the oxidation), I know it can be cleaned up it will be eventually, just have to find the time to do so. I will Take some pictures and put them up.

          I was just able to locate a color chart of Honda colors, and it does show it is clear coated but from the shape its in, it just does not look like it.

          Will post pictures soon

          Thanks

          Comment


          • #6
            Re: Wet Sanding, Wondering....

            So here are some pictures I took today,

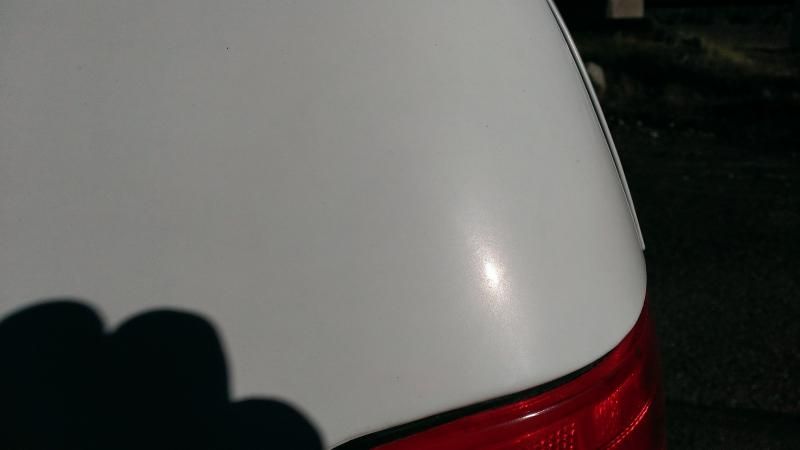
            This one here is the rear driver's side quarter panel....really no reflection at all! This is pretty much how the whole car is.


            This is rear quarter panel right above the tail light, sun only picture, pretty scary right ( i know i will spend hours working this thing over )


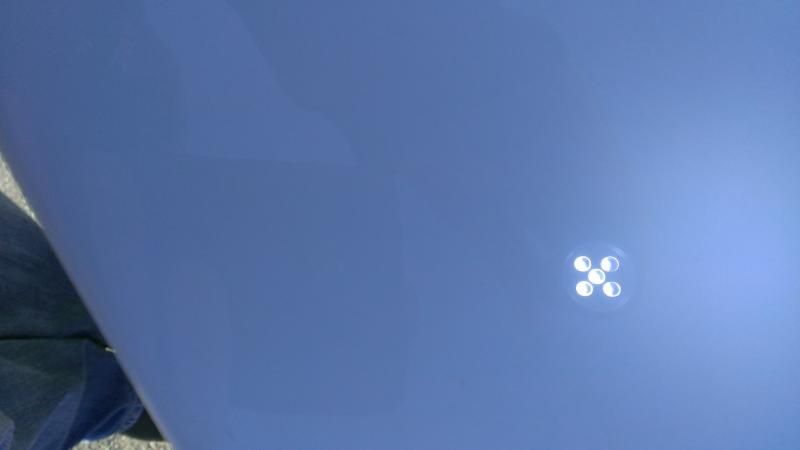
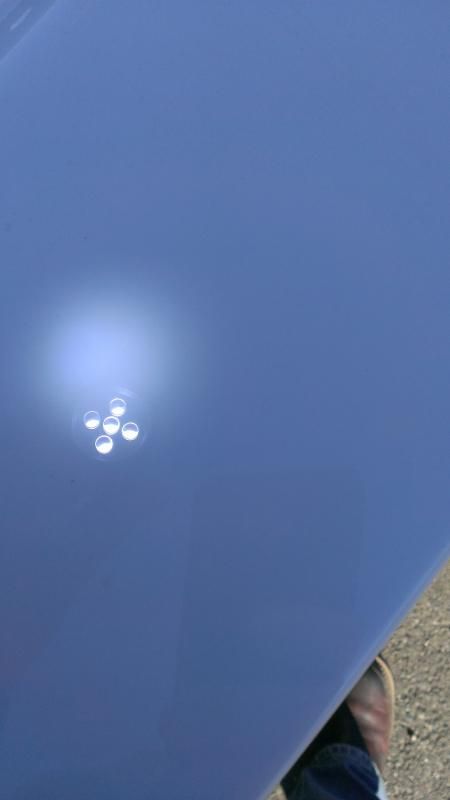
            This is a part of the spoiler where i did not compound the sanding marks out.


            After compunding...


            Sorry I couldnt resize the images being at work, i cant add programs to our computers for certain reasons!

            But compunding after the sanding was very easy and a lot longer cycles then prior.

            Comment


            • #7
              Re: Wet Sanding, Wondering....

              Like to add a little if I may to what Michael stated, Because it sounds like you your going to do the whole car as time allow's. Since your paint could be that old I would get a roll of 1/4'' & 1/2'' painters tape and tape up the edges and high body lines where the paint will be the thinnest, so as not to burn through. That way you can apply half of the tape on both sides of the edges and/or the 1/4'' on the high body lines. So when your sanding you need to stay back at least a 1/4 or so from the edge.

              And like Michael mention 3000 grit will remove more material then you think, and if that is getting you the results your happy with to be on the safe side (because if your paint is factory, the less heat you generate and less your buffing, the better off your paint will be) I would follow up with 5000 grit finishing paper. This way sanding (slow speed)with 3000 & 5000 finishing paper is far better for your finish(old paint) then using aggressive compound and the heat from your DA and buffing pads will be.

              Think about it this way If you can wet sand with 3000 & 5000 finishing paper/foam, the 5000 will start to add some gloss/shine back to your faded/dull white paint that the 3000 did at removing all that oxidized/dead paint. So your next step could be going stright to polishing with either Ultimate Polish (what I would start with/ remember least aggressive product/technique first) and if that didn't bring it back to satisfy you then move up to M205 or SwirlX (About the same in ability) Again this method won't generate as much heat (which clear coat's aren't to found of) then say using an aggressive compound/ a cutting or polishing pad at high speed and having to do a 2 step even though you will still have to do 4 to 5 section passes over that 18''X18'' area not to mention that not only is your pad against the surface generating heat but your backing plate and pad material with the hook & loop is also generating more heat(another reason to have the correct backing plate for your system of pads or disk) that is getting transfered down to the surface so there is a whole lot of friction going on in this small little 5 or 6'' area.

              But also note that you also have the control over how aggressive or least aggressive you can make a product: by this I'm refering to speed of machine/ downward pressure applying to pad/ arm speed/ how big or small of a section your working on/ and then there also another one I use (rather it's right or wrong I feel it works for me) how much product you apply, applying 3 to 4 drops which is the working product and if I don't want as much cut and I'm already working on soft paint, trying to keep from creating DA haze or going for less cut I will add more product so my pad will glide across the surface with less effort and have less effect or swith to a finishing pad.

              Have a body shop painting a 90's model S-10 hood for me in Black and applying more then average clear coat with a good amount of orange peel to do a review on using the 3000 & 5000 finishing paper or foam as I like to call it, but also hoping to get a paint thickness gauge so I can be more accurute and precise for a better review.

              But also think with your understanding of the process and studing the correct ways of doing such a high end time consuming paint correction even on your old paint just take your time, be patient and if your unsure back off because there couldn't be to much protection left if it's infact original CC and you don't need to remove any more then needs to be.
              ''USE THE LEAST AGGRESSIVE PRODUCT TO GET THE JOB DONE RIGHT''
              You Don't Know What You Can Do Until You Try '' TECHNIQUE IS EVERYTHING''
              Test Hoods Are Cheap And Most Of The Time Free

              Comment


              • #8
                Daniel, great info man I appreciate it. Like I said I was trying the whole wet sanding deal out, and can't agree more with everything you said. And you brought up a great point that was in the back of my mind, and Michael did as well. Compounding can be more aggressive then the sanding depending on how I go after it. When I started this I had no idea that it could or would making the buffing cycle longer then what it was previously, and I think I will try a couple other suggestions that had been suggested in other threads, some #7 polish, go heavy with that to try to get some oils back in the paint because it is extremely dry. Not going for a show finish at all just want to clean it up as much as possible, so it isn't so chalky/dry looking. If I do continue to wet sand I will definitely try to stay with the 3000 grit and tape off the body lines, no point in burning through the paint for no reason right. The way the car looks it's actually hard to believe that it's base and clear , it looks and acts like single stage, but factory codes states base and clear, just way neglected before I got it. Thank you again for all the useful information guys!

                Comment


                • #9
                  So after playing around some more, claying with traditional clay, and nano skin on the da, I noticed that both picked up a lot of , I guess pigment or color, being white. Even after the research on oem Honda white paint for this year 93, it is either just that bad or been repainted... I know parts of the car have been repainted, the front end because of over spray, trunk lid looks like oem paint. I tried d300 again, and it was grabbing on a foam pad too, so like Mr. Stoops said, it's just porous and extremely dry. I tried less aggressive compounds, ( like I should have started with but couldn't imagine in the shape it's in, it would work). Ultimate compound and also D151 PRC actually brought back the life of the paint. Clearly didn't kmock out some scratches like after the sanding did but both worked fairly well.

                  I also noticed some shine before compounding as well, the clay was a mild difference, but nano skin on the DA really brought some life back, and while doing the clay with the nano skin I noticed the paint was also getting more white, like the paint was stained with dirt. You could clearly tell where the nano skin had been versus where it hadn't. I unfortunately didn't take any pictures because I was limited on Sun light, but honestly amazing.

                  I had some left over sanding marks that I left on purpose and went over the sanded area with the D151 and to my surprise, it actually took a lot of the sanding marks out with minimal pressure and on speed 5.5 with 4 passes medium arm speed.

                  Ultimately, I think I know the process that needs to be done to bring the life back to this paint, ultimate compound or D151. My plan of attack is the following:
                  Nano skin
                  Ultimate Compound
                  Then going to see what the MF system will do after that, to try to work out some of the deeper stuff that is still left in the paint. After the first steps after the sanding and then ultimate compound by itself, I am pretty excited to see how it turns out.

                  Sorry about the rambling, but it's going to be a 360 on the finish!

                  Comment

                  Your Privacy Choices
                  Working...
                  X