

 Tweet
Tweet
Tips for how to correctly take pictures to document an Extreme Makeover
If you want to do a great job of documenting your work when you're doing an extreme makeover on a special interest car it's vitally important to do two things,
Here's an example, in the pictures below the car and the camera are in the same position but only two shots are with the car in the same location.
Before in the sun

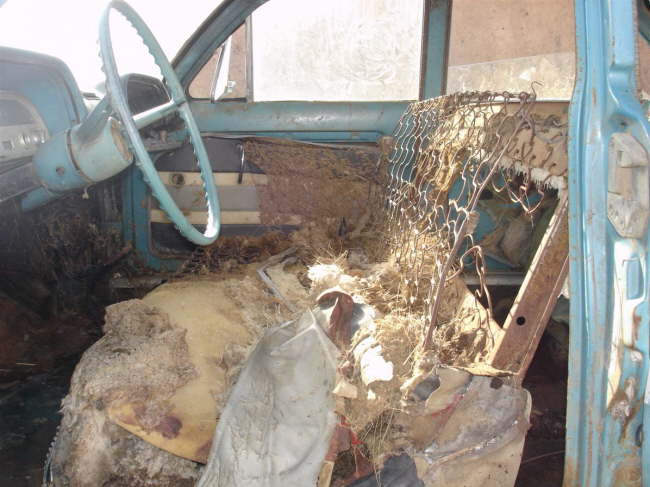
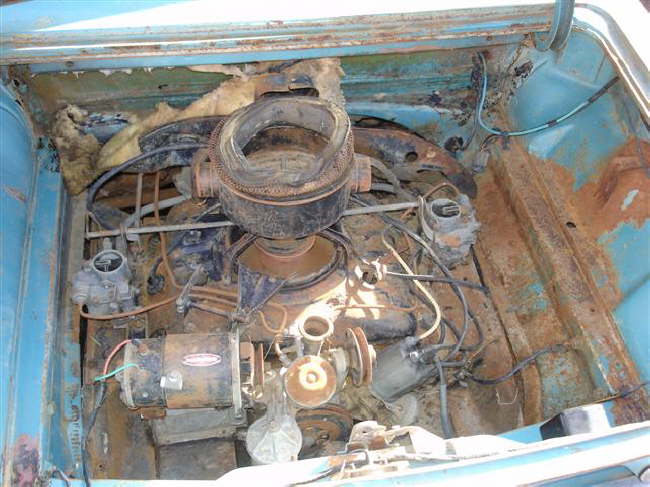
Before in the garage

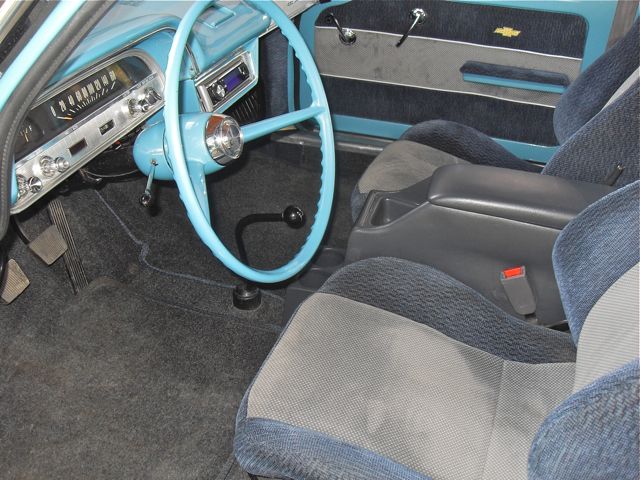
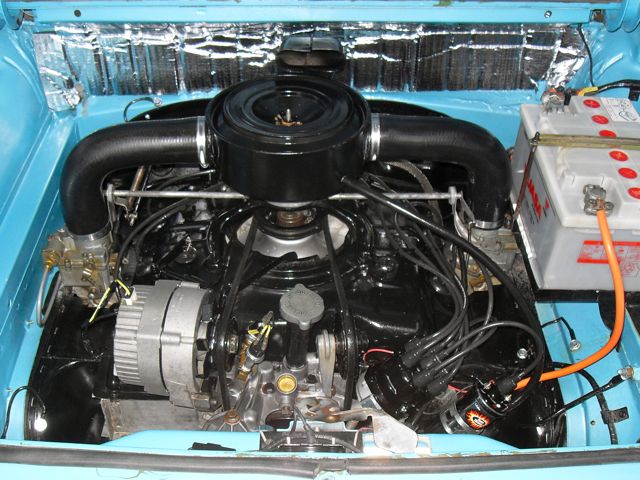
After in the garage

Couldn't get an after in the sun as the sun was never around when the car was finish and this is a problem for many detailers.
This is a powerful way to capture the before and after photos and keep the proper and even perfect perspective in all your shots to completely tell your amazing before and after story.
We'll add some more pictures and develop this article as time permits but this should get the basic idea across.
MOST IMPORTANT
If you're doing an Extreme Makeover on a Special Interest Car, especially if the paint is a heavily oxidized single stage paint finish or an extremely swirled out clear coat paint finish, the it's vitally important to capture the Before Pictures.
Why?
Because once you bring a machine polisher or even your hand down onto the paint and start removing oxidation and other defects you can NEVER go back and get these pictures. And the reason this is important is because that's where the value and the power in your pictures comes from, the before pictures. Once you've restored the finish you can always get more "After" shots, but you can never go back in time and capture the "Before" shots.
Also, don't do a Test Spot on the paint until AFTER you get all your before shots, it takes too much power away from the before shot.
Car enthusiasts in general and detailing enthusiasts in specific love to see a great write-up of an extreme makeover on a special interest car but what makes a great write up is great before and after shots.
So while yes, it takes some time and some dedication to capture these shots, it's worth it for all the car detailing joy it brings all of us.
Hope this helps...

If you want to do a great job of documenting your work when you're doing an extreme makeover on a special interest car it's vitally important to do two things,
- Capture the before shots
- Captures key before & after shots with the camera and the pictures in the same position. If possible also in the same location.
Here's an example, in the pictures below the car and the camera are in the same position but only two shots are with the car in the same location.
Before in the sun
Before in the garage
After in the garage
Couldn't get an after in the sun as the sun was never around when the car was finish and this is a problem for many detailers.
This is a powerful way to capture the before and after photos and keep the proper and even perfect perspective in all your shots to completely tell your amazing before and after story.
We'll add some more pictures and develop this article as time permits but this should get the basic idea across.
MOST IMPORTANT
If you're doing an Extreme Makeover on a Special Interest Car, especially if the paint is a heavily oxidized single stage paint finish or an extremely swirled out clear coat paint finish, the it's vitally important to capture the Before Pictures.
Why?
Because once you bring a machine polisher or even your hand down onto the paint and start removing oxidation and other defects you can NEVER go back and get these pictures. And the reason this is important is because that's where the value and the power in your pictures comes from, the before pictures. Once you've restored the finish you can always get more "After" shots, but you can never go back in time and capture the "Before" shots.
Also, don't do a Test Spot on the paint until AFTER you get all your before shots, it takes too much power away from the before shot.
Car enthusiasts in general and detailing enthusiasts in specific love to see a great write-up of an extreme makeover on a special interest car but what makes a great write up is great before and after shots.
So while yes, it takes some time and some dedication to capture these shots, it's worth it for all the car detailing joy it brings all of us.
Hope this helps...


Comment