

 Tweet
Tweet
Hey everyone,
Growing up over the years, I have seen a lot of changes. Some of the changes in technology are downright astounding! However, as the ultraviolet (UV) rays become more intense requiring now SPF 70 to help prevent sunburns, when as a kid SPF 8 would have been a really high number, these UV rays are doing damage. So while technology is trying to keep up with the change, sometimes we need to intervene to offset the damaging rays.
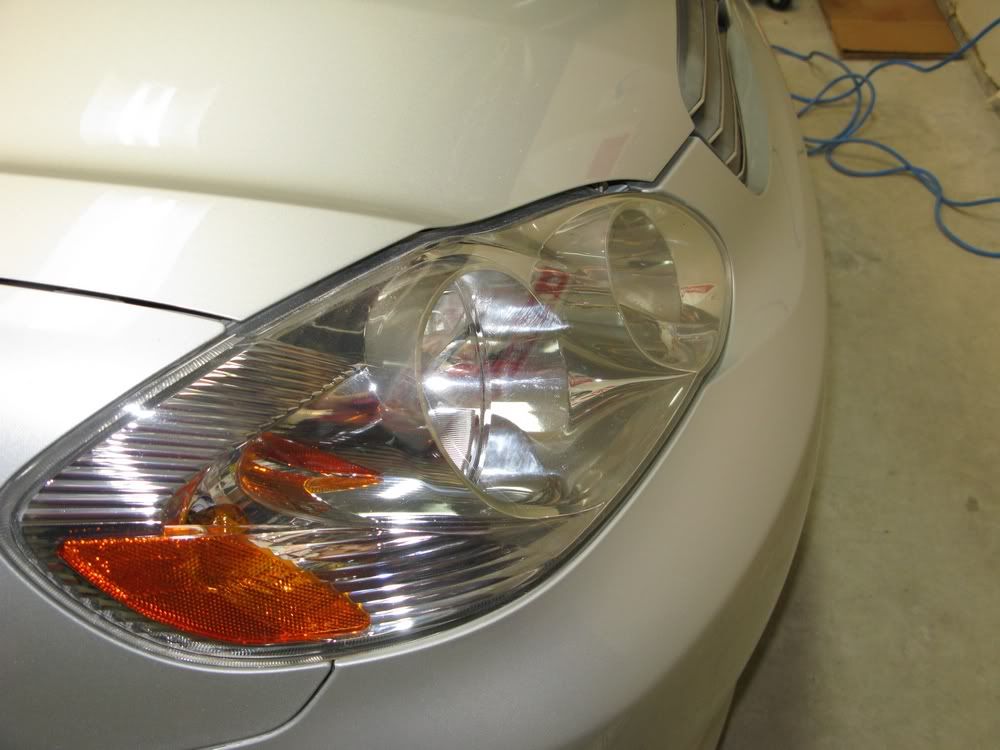
On modern cars and trucks, the headlights are subjected over time to pitting, surface scratches and of course the damaging ultraviolet rays mentioned above. As a result, the lenses become foggy, hazy and often turn yellow thereby ruining their crystal clear appearance to the point of even impairing your nighttime vision creating a safety issue!
For years I have polished polycarbonate plastics, Lexan and even Plexiglas. Each type of material requires its own technique from using a torch to bring back clear edges on cut Plexiglas to using a rotary and a finishing pad with M03 on certain Lexan products. But headlights have presented a unique problem. There are many theories as to how headlights yellow and oxidize. Some believe that the polycarbonate lens pores will expand when heated allowing dirt to enter into the pores thereby discoloring the headlights. However, many headlights have a UV coating on them and therefore an expansion of the pores must be minimal or so I would assume. But regardless of why it happens and it will, we need a solution to the problem!
About 6 years ago when I was first introduced to Meguiar’s PlastX, I did a review of the product. I used it on both headlights, and even instrument clusters to demonstrate its versatility. One of the things I mentioned is that PlastX needs to be applied correctly to obtain the maximum performance from it. So over the last 6 years, I have found different ways of using it. For example, on instrument clusters, instead of a foam applicator, I use a MF applicator. Instead of working the product to a light residue, in some cases I work it until it is gone and the residue has formed a buffing rouge on the applicator thereby creating the ultra clear and refined finish! I then began using it with a PC before it became a somewhat known practice. The PC with a foam finishing pad could do wonders for headlights! But what about headlights with aiming adjusters built into the front of the lens itself? For that I used small 4” pads with a drill or air DA polisher. I have 5 different aggressive grades of 4” pads I use on a drill, from heavy twisted wool to ultra fine finishing foam. My process was laborious, but the results were often spectacular! But one needed access to the pads and most people will not go out and buy special 3” backing plates and these specialized pads. So an easier solution was needed
Now Meguiar’s has made that process accessible to everyone in the form of their New Meguiar’s Headlight Restoration Kit!

This new kit comes with a 6 oz bottle of PlastX, an easy buff wool pad and a microfiber towel. The easy buff pad is approximately 4” in diameter and has a built in backing plate that attaches to a drill. The pad was designed by Meguiar’s so that it could have a more rounded edge for protection. The shaft on the pad allows a person to extend the pad away from the drill slightly for better lens access. My only suggestion for the future would be an even longer shaft as I have come across a few recessed lights where I had problems getting my pad and drill into. Otherwise, Meguiar’s has provided the user with a polishing wool pad that as you will see in the review, works awesome with the PlastX!!!!
I have seen it posted, and somewhat erroneously by a few who obviously have not used the product, that an electric drill is required so there is enough power to use the product. I have found that just like using a wool pad on a rotary, the cut can be controlled somewhat by speed and pressure. A 14 volt or an 18 volt cordless drill works just great and is far more convenient if polishing marker lights on a RV for example! I use a Dewalt 18 volt or my Makita 14 volt cordless drills, both of which have plenty of torque and speed to do the job!!! Moreover, a cordless drill has an advantage of not having a cord that may get dragged across your paint etc if you are buffing plastic on a higher surface. When using the wool pad, I would suggest that you use a medium speed and moderate to light pressure easing up on the pressure as the product polishes out to a light residue.
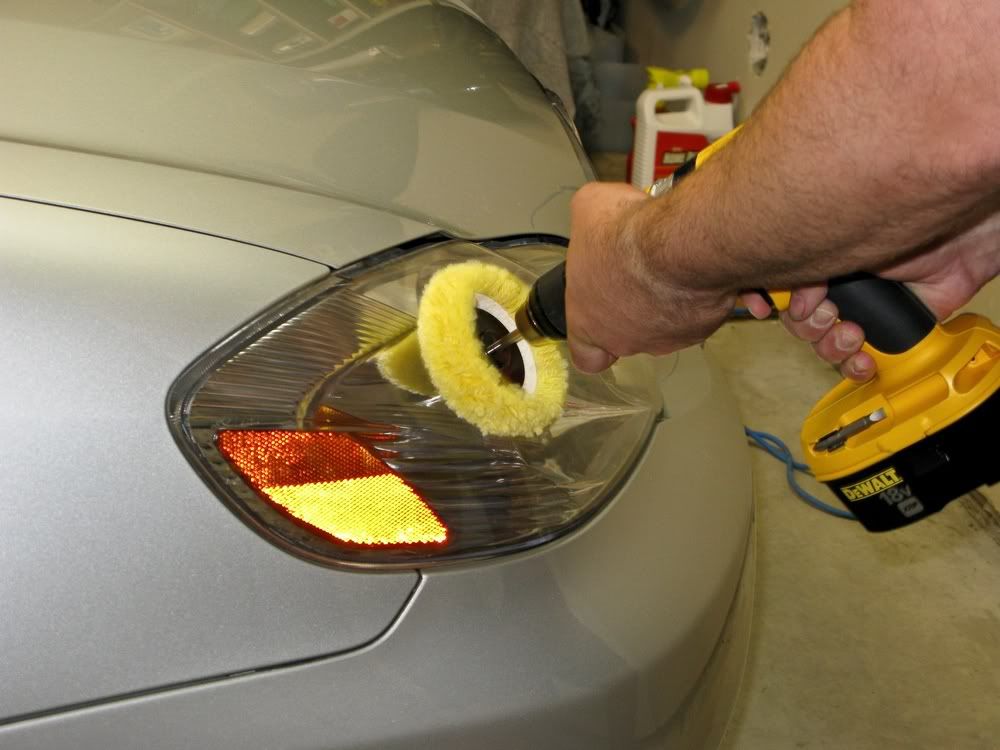
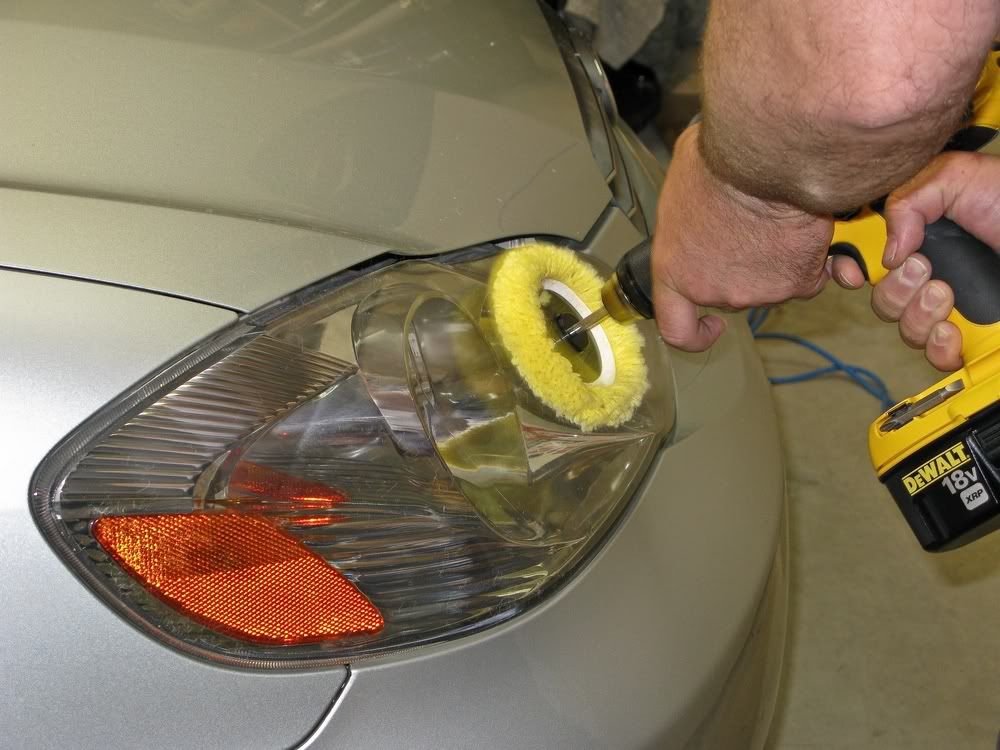
To apply the PlastX, I first prime the wool pad with PlastX and work it in with my fingers. I make sure to apply it to the entire pad and even around the outside edges. You may get a little sling from product that is on the outside edges, but I have found that you need product on the edge to fully access certain areas of the headlight. Now, after applying 2-3 small drops of product onto the buff, lightly place the wool buff against the pre-cleaned headlight (I like to wipe the lights down with M34 Final Inspection before I start; just to make sure that there are no dirt particles that could scratch the lens during buffing). Start the drill slowly, working the product all around the face of the lens. Once you have a thin coat on the surface, speed the drill up and continue buffing. Work the product in a cross-hatch pattern, being sure to cover the entire light. Use caution around protruding headlight adjusters as you do not want to snag the wool buff on the adjusters as it may damage the pad, the light or both. Work the product until it is a light residue and then remove with the supplied microfiber towel. Now evaluate the surface. If you need to do a couple more passes, then do so. Just remember that on your final pass to lighten the pressure you are applying to the pad. I also like to wipe gently in one direction with the microfiber towel, just to be extra careful. And that is it!! After doing the headlights, move on to the taillights, roof markers, side markers, and even the product badge on the car if it is made out of plastic! In the end, you will have much better looking plastics!!!!!
Now one caveat needs to be mentioned: do not expect miracles! Often, people buy a product hoping that it will transform thoroughly damaged lights and restore them to new condition. If the lights are that severely damaged that PlastX, with the wool pad and drill does not improve them you may need to consider wet sanding them or even replacing them. In some cases the yellowing may be simply too deep or even on the inside of the lens housing. If the lights are cracked and moisture has condensed and fogged the lens on the inside, it too can not be fixed.
However, in the vast majority of cases, the Meguiar’s Headlight Restoration Kit does work incredibly well! And now with the wool pad as part of a kit, you will be amazed at just how well it works and how easy it is to restore plastics to incredible clarity!!! Meguiar’s has taken an already outstanding product, PlastX, and has raised the bar even higher by making a kit that the general public can now use to restore their headlights and tail-lights!
I will let the below pictures speak for themselves!!!!
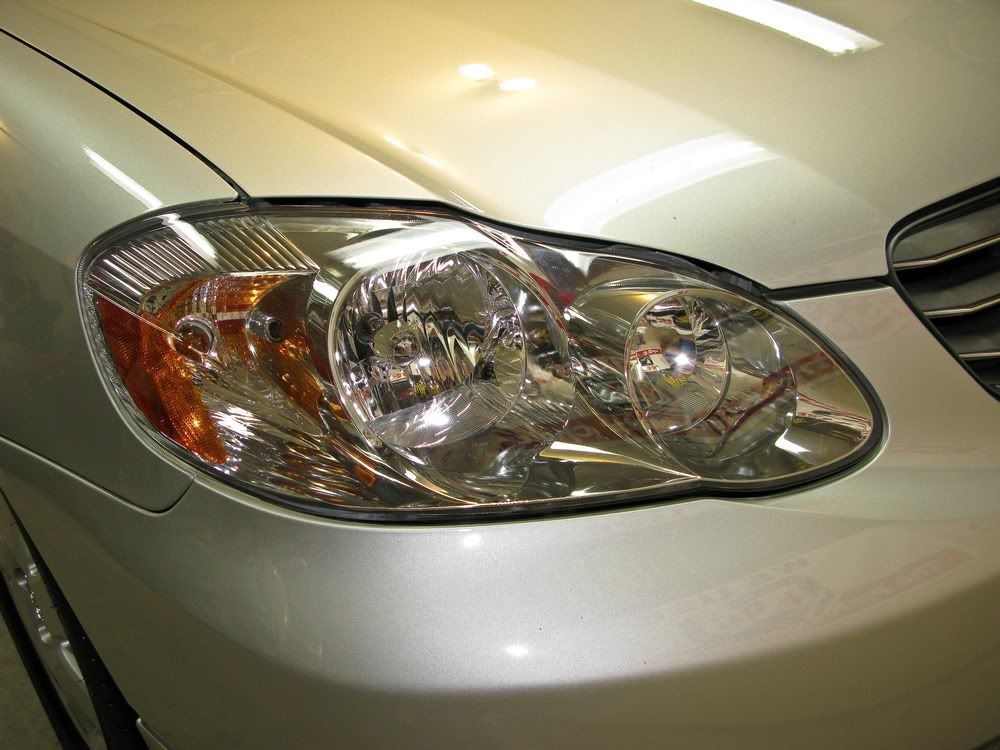
Before
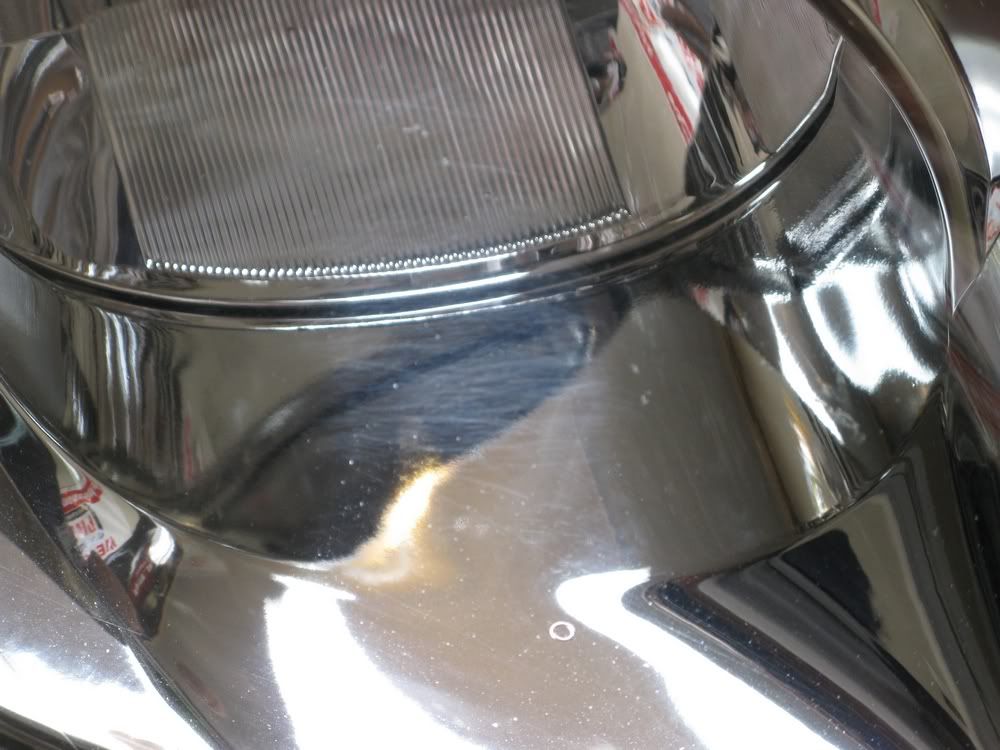
During
Applying it to the wool pad; Make sure you have the drill set to neutral because if you bump the trigger, you will wear product!!!

Followed by PlastX on the DA with a 5” 3M polishing Pad


Wiping off the residue! The light looks fantastic!!!

The end result: crystal clear headlights! Please keep in mind that the car is a 2003 that sits outside all year and is driven daily on snowy winter roads!!!
And the driver’s side completed!
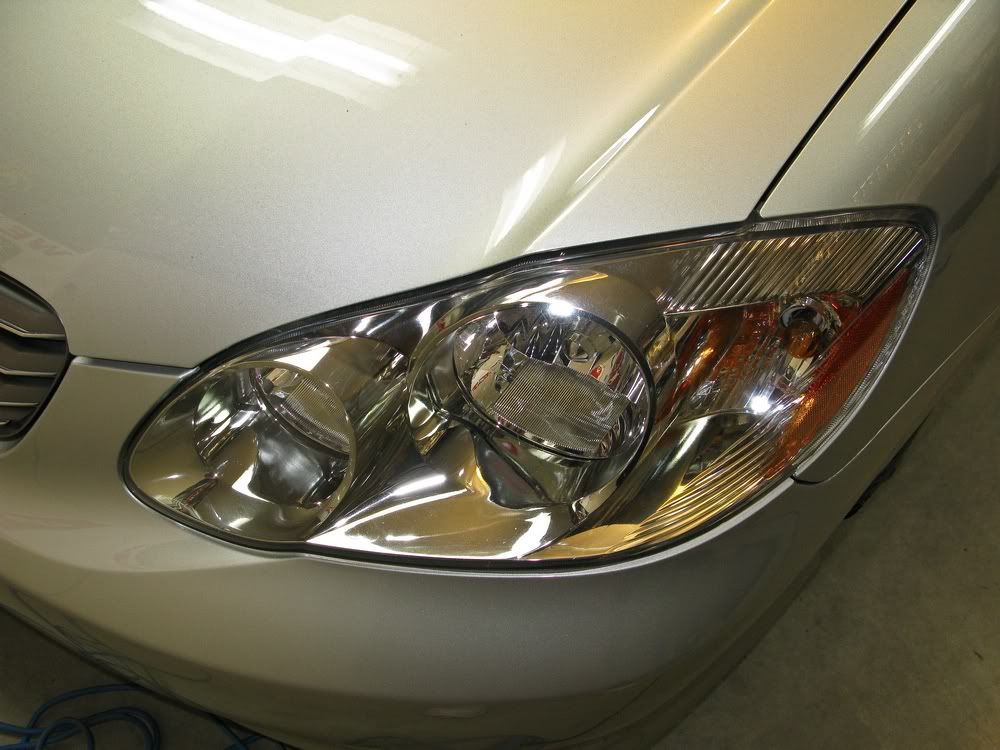
The small amount of time and effort resulted in amazing looking lights! There is no hazing and no swirling etc. The lights look like new! Not bad for a 2003 daily driver!!!
I hope this helps!
Tim
Growing up over the years, I have seen a lot of changes. Some of the changes in technology are downright astounding! However, as the ultraviolet (UV) rays become more intense requiring now SPF 70 to help prevent sunburns, when as a kid SPF 8 would have been a really high number, these UV rays are doing damage. So while technology is trying to keep up with the change, sometimes we need to intervene to offset the damaging rays.
On modern cars and trucks, the headlights are subjected over time to pitting, surface scratches and of course the damaging ultraviolet rays mentioned above. As a result, the lenses become foggy, hazy and often turn yellow thereby ruining their crystal clear appearance to the point of even impairing your nighttime vision creating a safety issue!
For years I have polished polycarbonate plastics, Lexan and even Plexiglas. Each type of material requires its own technique from using a torch to bring back clear edges on cut Plexiglas to using a rotary and a finishing pad with M03 on certain Lexan products. But headlights have presented a unique problem. There are many theories as to how headlights yellow and oxidize. Some believe that the polycarbonate lens pores will expand when heated allowing dirt to enter into the pores thereby discoloring the headlights. However, many headlights have a UV coating on them and therefore an expansion of the pores must be minimal or so I would assume. But regardless of why it happens and it will, we need a solution to the problem!
About 6 years ago when I was first introduced to Meguiar’s PlastX, I did a review of the product. I used it on both headlights, and even instrument clusters to demonstrate its versatility. One of the things I mentioned is that PlastX needs to be applied correctly to obtain the maximum performance from it. So over the last 6 years, I have found different ways of using it. For example, on instrument clusters, instead of a foam applicator, I use a MF applicator. Instead of working the product to a light residue, in some cases I work it until it is gone and the residue has formed a buffing rouge on the applicator thereby creating the ultra clear and refined finish! I then began using it with a PC before it became a somewhat known practice. The PC with a foam finishing pad could do wonders for headlights! But what about headlights with aiming adjusters built into the front of the lens itself? For that I used small 4” pads with a drill or air DA polisher. I have 5 different aggressive grades of 4” pads I use on a drill, from heavy twisted wool to ultra fine finishing foam. My process was laborious, but the results were often spectacular! But one needed access to the pads and most people will not go out and buy special 3” backing plates and these specialized pads. So an easier solution was needed
Now Meguiar’s has made that process accessible to everyone in the form of their New Meguiar’s Headlight Restoration Kit!
This new kit comes with a 6 oz bottle of PlastX, an easy buff wool pad and a microfiber towel. The easy buff pad is approximately 4” in diameter and has a built in backing plate that attaches to a drill. The pad was designed by Meguiar’s so that it could have a more rounded edge for protection. The shaft on the pad allows a person to extend the pad away from the drill slightly for better lens access. My only suggestion for the future would be an even longer shaft as I have come across a few recessed lights where I had problems getting my pad and drill into. Otherwise, Meguiar’s has provided the user with a polishing wool pad that as you will see in the review, works awesome with the PlastX!!!!
I have seen it posted, and somewhat erroneously by a few who obviously have not used the product, that an electric drill is required so there is enough power to use the product. I have found that just like using a wool pad on a rotary, the cut can be controlled somewhat by speed and pressure. A 14 volt or an 18 volt cordless drill works just great and is far more convenient if polishing marker lights on a RV for example! I use a Dewalt 18 volt or my Makita 14 volt cordless drills, both of which have plenty of torque and speed to do the job!!! Moreover, a cordless drill has an advantage of not having a cord that may get dragged across your paint etc if you are buffing plastic on a higher surface. When using the wool pad, I would suggest that you use a medium speed and moderate to light pressure easing up on the pressure as the product polishes out to a light residue.
To apply the PlastX, I first prime the wool pad with PlastX and work it in with my fingers. I make sure to apply it to the entire pad and even around the outside edges. You may get a little sling from product that is on the outside edges, but I have found that you need product on the edge to fully access certain areas of the headlight. Now, after applying 2-3 small drops of product onto the buff, lightly place the wool buff against the pre-cleaned headlight (I like to wipe the lights down with M34 Final Inspection before I start; just to make sure that there are no dirt particles that could scratch the lens during buffing). Start the drill slowly, working the product all around the face of the lens. Once you have a thin coat on the surface, speed the drill up and continue buffing. Work the product in a cross-hatch pattern, being sure to cover the entire light. Use caution around protruding headlight adjusters as you do not want to snag the wool buff on the adjusters as it may damage the pad, the light or both. Work the product until it is a light residue and then remove with the supplied microfiber towel. Now evaluate the surface. If you need to do a couple more passes, then do so. Just remember that on your final pass to lighten the pressure you are applying to the pad. I also like to wipe gently in one direction with the microfiber towel, just to be extra careful. And that is it!! After doing the headlights, move on to the taillights, roof markers, side markers, and even the product badge on the car if it is made out of plastic! In the end, you will have much better looking plastics!!!!!
Now one caveat needs to be mentioned: do not expect miracles! Often, people buy a product hoping that it will transform thoroughly damaged lights and restore them to new condition. If the lights are that severely damaged that PlastX, with the wool pad and drill does not improve them you may need to consider wet sanding them or even replacing them. In some cases the yellowing may be simply too deep or even on the inside of the lens housing. If the lights are cracked and moisture has condensed and fogged the lens on the inside, it too can not be fixed.
However, in the vast majority of cases, the Meguiar’s Headlight Restoration Kit does work incredibly well! And now with the wool pad as part of a kit, you will be amazed at just how well it works and how easy it is to restore plastics to incredible clarity!!!
Meguiar’s has taken an already outstanding product, PlastX, and has raised the bar even higher by making a kit that the general public can now use to restore their headlights and tail-lights! I will let the below pictures speak for themselves!!!!
Before
During
Applying it to the wool pad; Make sure you have the drill set to neutral because if you bump the trigger, you will wear product!!!
Followed by PlastX on the DA with a 5” 3M polishing Pad
Wiping off the residue! The light looks fantastic!!!
The end result: crystal clear headlights! Please keep in mind that the car is a 2003 that sits outside all year and is driven daily on snowy winter roads!!!
And the driver’s side completed!
The small amount of time and effort resulted in amazing looking lights! There is no hazing and no swirling etc. The lights look like new! Not bad for a 2003 daily driver!!!
I hope this helps!
Tim

Comment