• If this is your first visit, be sure to check out the FAQ by clicking the link above. You may have to register before you can post: click the register link above to proceed. To start viewing messages, select the forum that you want to visit from the selection below.

Announcement

Collapse
No announcement yet.

Wet sanding direction

Collapse
X
 
  • Filter
  • Time
  • Show
Clear All
new posts

  • Wet sanding direction

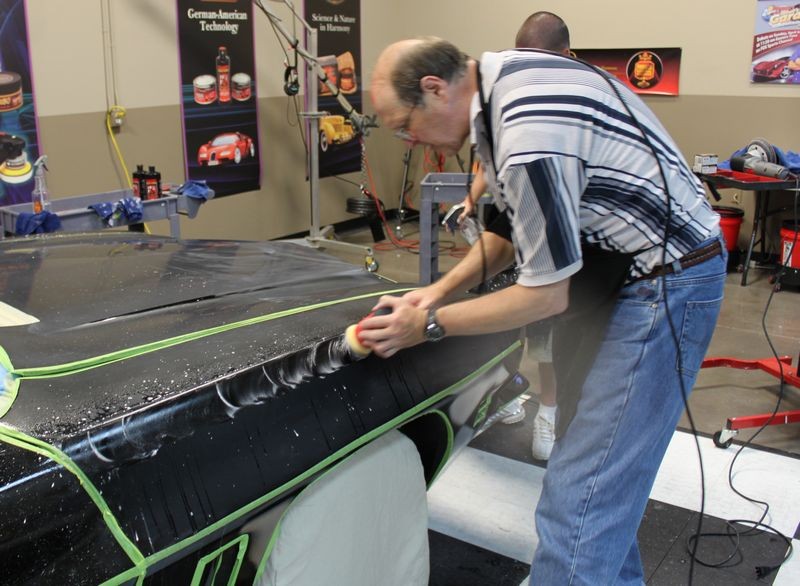
    In order to remove orange peels, I used 1200grit sanding paper on my single stage paint
    Buffing with #85 wasnt able to remove the deep sanding marks (expected), so I think I need to use some finishing papers first

    My question is
    Should I use the finishing papers in the same direction I used before, or should I use it in the perpendicular direction ??

  • #2
    Re: Wet sanding direction

    You don't want to go fully 90 degrees to your initial sanding marks but you don't want to go in the exact same direction, either. Something in the fairly broad range of 10 to 30 degrees to the initial direction should be your target.

    Out of curiosity, what grit did you finish with the first time around, and what are you planning on going with now?
    Michael Stoops
    Senior Global Product & Training Specialist | Meguiar's Inc.

    Remember, this hobby is supposed to be your therapy, not the reason you need therapy.

    Comment


    • #3
      Re: Wet sanding direction

      Originally posted by Michael Stoops View Post
      You don't want to go fully 90 degrees to your initial sanding marks but you don't want to go in the exact same direction, either. Something in the fairly broad range of 10 to 30 degrees to the initial direction should be your target.

      Out of curiosity, what grit did you finish with the first time around, and what are you planning on going with now?
      If you were trying to buff out 1200 grit scratches they would be more resistant to completely buffing out. Personally I finish with 2000 grit. Some people go to 3000, but I don't currently do that.

      I haven't much experience with M85, however I've used M84 to buff out 1500, and 2000 grit scratches many times. I have actually just finished buffing my own car and sanded a deep scratch from the passenger side with 2000 grit. I was able to completely remove the scratch and buff it out with a DA polisher and M105 with a cutting pad. Took about two passes to remove all the marks.

      I'd never used a cutting pad on a DA and don't recommend it but as I've had a lot of DA and rotary experience and had the DA set up and ready to go I thought why not. I was surprised at the speed and ease of the result.

      I agree with Mike on re-sanding the panel on a 10-30 degree angle, with a higher grit than 1200. The higher the grit, the easier to buff out, and the more uniform the result.

      Comment


      • #4
        Re: Wet sanding direction

        Originally posted by Michael Stoops View Post
        You don't want to go fully 90 degrees to your initial sanding marks but you don't want to go in the exact same direction, either. Something in the fairly broad range of 10 to 30 degrees to the initial direction should be your target.

        Out of curiosity, what grit did you finish with the first time around, and what are you planning on going with now?
        The first time I didnt finish at all
        Thought that the wool pad might do anything good

        My plan now, is to either finish with 2500grit papers (wet sanding)
        Or 1500grit discs with an interface pad and a mist of water (that would be faster/easier)

        Unfortunately I dont have any finishing discs

        Comment


        • #5
          Re: Wet sanding direction

          As discussed on another forum...

          Crosshatch sanding can save time in the long run:


          I don't see any real problem going 90 degrees to the first cut. In fact, you'll get a more consistent polishing result, technically speaking. Plus, if a guy was using a really long block (if reasonable to do so), alternate or varied directions of sanding would level the surface more consistently.
          Kevin Brown
          NXTti Instructor, Meguiar's/Ford SEMA Team, Meguiar's Distributor/Retailer

          Comment


          • #6
            Re: Wet sanding direction

            From yet another thread, a long discussion about all things related to sanding. This part referred to leveling:


            I hope we can agree to reserve the term leveling for those instances when we want to minimize the peak and valley variances of a paint surface. This way, discussions about leveling or truing of the surface won't get overly confusing for newbies.

            At least for the remainder of this discussion:

            To level a surface means to minimize the peak and valley variances of the surface.
            Orange peel, waviness, and long, level sanding marks shall be categorized here.

            To refine a surface means to minimize or eliminate unwanted elements from the surface other than those listed above.
            Elements include scratches, pinhole-sized divets, or etching marks (isolated low spots).

            These definitions are as distinct as I can think to make them right now.

            I wish to make the distinction because we could feasibly refine or eliminate the imperfections from an orange peeled surface without eliminating its curvy peaks and valleys landscape.

            In other words, if you said to me:

            Barry: Kevin, see that sandy desert out yonder?

            Kevin: Yes Barry.

            Barry: If I asked you to level it with this flat shovel, how would you do it?

            Kevin: I would take shovels full of sand from the flowing hills, and place them into the valleys until the surface was flat.

            Barry: And if I asked you to refine the desert landscape, what would you do?

            Kevin: Well Barry, I would take my flat shovel and pat the sand flat until it all of the sand grains were tightly packed together.

            Barry: You're hired!
            Kevin Brown
            NXTti Instructor, Meguiar's/Ford SEMA Team, Meguiar's Distributor/Retailer

            Comment


            • #7
              Re: Wet sanding direction

              Someone sent me the link to this thread so I though I would chime in...

              I agree with Kevin.

              I learned the crosshatch pattern technique using the same grit from Rich Evans, (Car Warriors), when we sanded down the Meguiar’s MTC trucks at Rich’s shop. (Huge, flat surfaces)

              When I worked for Meguiar’s we always taught sanding in straight lines. I teach all three techniques in my sanding classes.

              The one thing I've learned over the years from teaching wetsanding or machine dampsanding is that after a person learns what's involved the majority of people attending the class never want to sand down an entire car, especially if it's not their own.
              • Too much work
              • Too much risk
              It's truly an art form to do it and do it right.

              On February 4th, I have a wetsanding class coming up where we'll be sanding down a brand new paint job on this 1989 K5 Blazer. We'll be machine sanding using Meguiar's Unigrit discs wherever we can and only hand sanding where we cannot safely machine sand. If you're in South Florida, you're welcome to sign-up for this class. It's a completely different experience sanding down an entire vehicle with the goal not to make any mistakes and please the customer than it is to sand on a hood, cookie sheet or even rental car.


              Machine sanding is the best way to go in my opinion but there are places you cannot safely machine sand and for these places you must work by hand.

              Besides using DA Polishers like the Meguiar's G110v2 to dampsand we'll also be using a 3" Mini Polisher outfitted with Meguiar's 3" interface pads and Meguiar's 3" Unigrit sanding and finishing discs. The 3" sanding discs work really well for sanding in tight areas or on thin panels between body lines.

              Meguiar's 3" Unigrit Discs at work on a 1970 GTO


              Mike Phillips
              760-515-0444
              showcargarage@gmail.com

              "Find something you like and use it often"

              Comment


              • #8
                Re: Wet sanding direction

                Sounds extremely interesting
                But unfortunately I'm from Egypt (the other side of the globe)
                I might consider flying to the US to learn some professional techniques... but not at this time (insufficient funds)

                From the last image you sent
                I see you're tapping all edges

                Is this a common practice when sanding ??

                Comment


                • #9
                  Re: Wet sanding direction

                  Originally posted by asalah View Post
                  From the last image you sent
                  I see you're tapping all edges
                  Is this a common practice when sanding ??
                  Sanding is a very messy process - it's a quick paint removal so paint is everywhere. Therefore taping will prevent removed paint from getting to unwanted areas.

                  When sanding or buffing with aggressive compounds remember that high edges have the thinnest layer of paint so you don't want to be too aggressive on those.

                  Comment


                  • #10
                    Re: Wet sanding direction

                    Another question please

                    How many sanding sheets do you often need in average to completely sand a sedan suffering from orange peels ?

                    Bringing those sheets to Egypt costs me lot, so I need to know how many sheets are needed for both sanding and finishing, in order to calculate costs

                    Comment


                    • #11
                      Re: Wet sanding direction

                      Posted my last q to a new thread

                      Comment

                      Working...
                      X
                      gtag('config', 'UA-161993-8');