

 Tweet
Tweet
That's right boys and girls, The Junkman has went and made paint correction so easy, a caveman could do it! In the following videos, I cover the entire process from start to finish. The first two videos are worth their weight in gold for the information alone. I don't even start working on the paint until the third video but the amount of information I cover in the first two videos is priceless. Do NOT skip through them!
If you have ever been apprehensive about using a machine to rid your paint of scratches and swirls, you will definitely not be worried after watching this video series. I break it down to a level where a 10 year old can watch these videos and start fixing paint. The supplies and equipment that I use are readily available in the USA and abroad (for the most part). If you have a serious desire to finally fix your paint and about 1 hour and 54 minutes, then this video series is totally for you. After you have watched this series, you will not believe how easy I have made this.
So sit back and get out some popcorn, kick up your feet and enjoy. The Junkman is about to burst onto your screen in a way that only the Junkman can! :thumbsup:
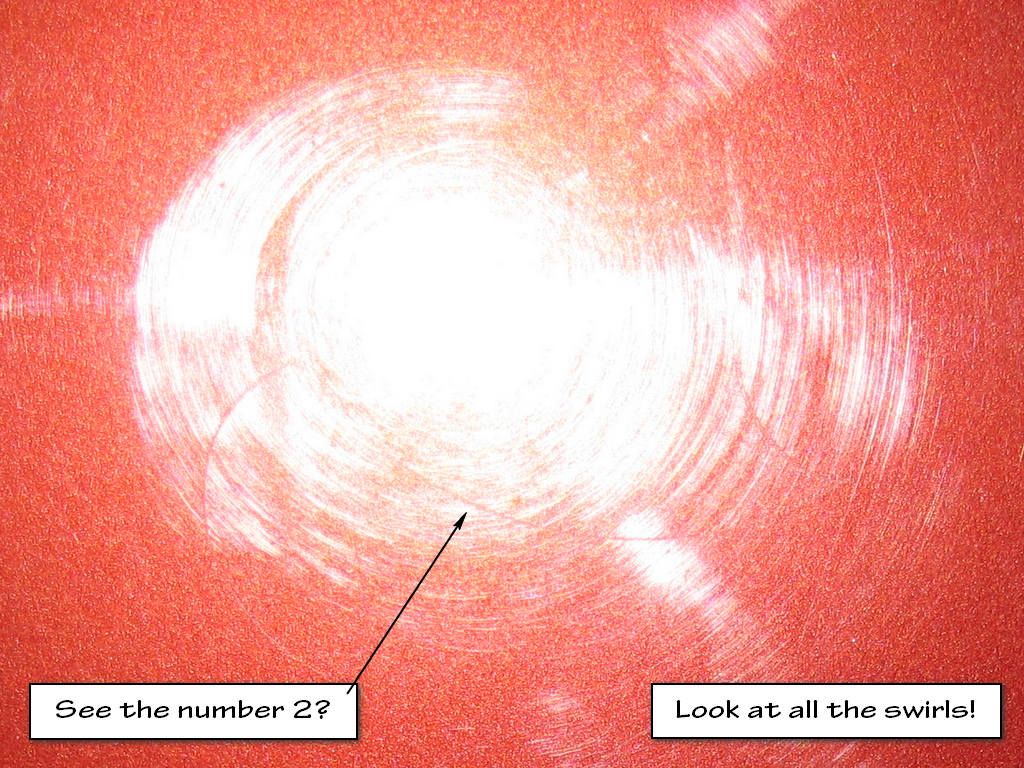
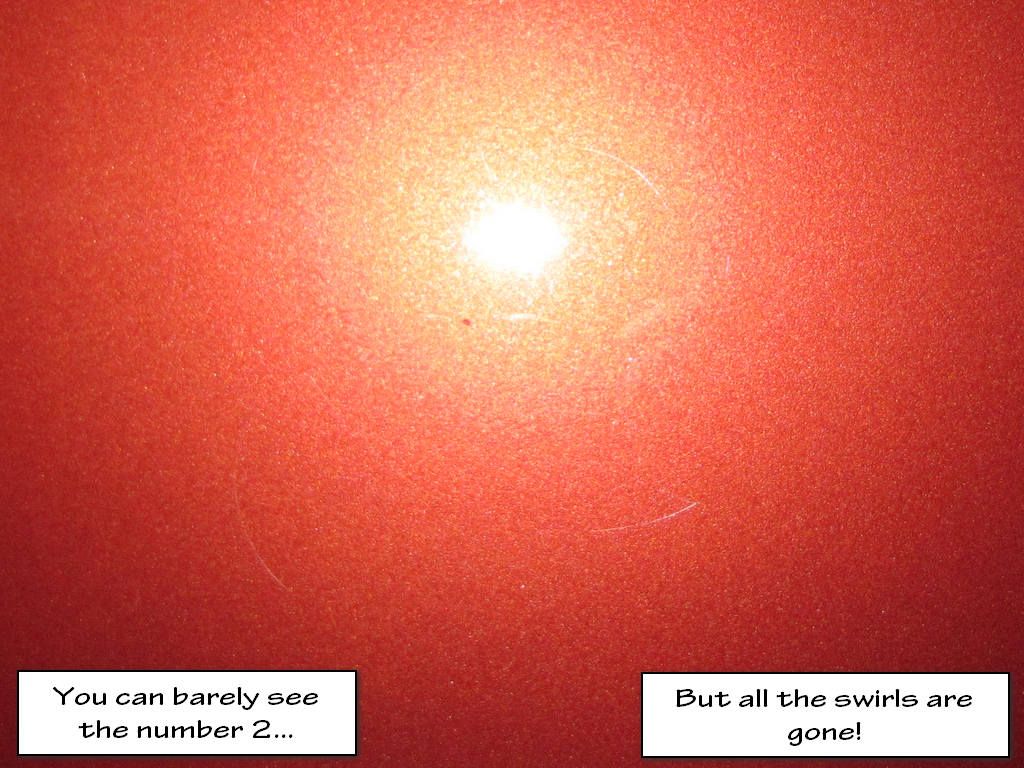
Here are your before and after shots, which won't make a lot of sense until you have watched the videos, especially when you see how the number "2" ended up in the paint!
BEFORE...
AFTER!
Part 1 - Hey boys and girls! Finally, a video series that takes the process of paint correction from the beginning to the end (from claying to waxing). Although I do not apply any wax at the end, I cover everything else in detail. This series is 1 hour and 54 minutes long so that should give you an idea as to how much detail I go into.
In this first video, I talk in detail about exactly what paint correction is. I also go into detail about the polishing technique you should use as well as the best product on the market that you should buy. I cover other topics too so just sit back and kick up your feet. This video is 15 minutes and 7 seconds long.

Part 2 - In this video, I go into detail about exactly what I use to remove the paint damage within this video series. I name and visually show every piece of equipment as well as all of the products necessary to do paint correction. In some cases, I even offer up a location where you can find the products that I use. I talk about why I chose to use the products that I use as well as what I don't use. If you want a list of these items, WATCH THIS VIDEO!

If you have ever been apprehensive about using a machine to rid your paint of scratches and swirls, you will definitely not be worried after watching this video series. I break it down to a level where a 10 year old can watch these videos and start fixing paint. The supplies and equipment that I use are readily available in the USA and abroad (for the most part). If you have a serious desire to finally fix your paint and about 1 hour and 54 minutes, then this video series is totally for you. After you have watched this series, you will not believe how easy I have made this.
So sit back and get out some popcorn, kick up your feet and enjoy. The Junkman is about to burst onto your screen in a way that only the Junkman can! :thumbsup:
Here are your before and after shots, which won't make a lot of sense until you have watched the videos, especially when you see how the number "2" ended up in the paint!
BEFORE...
AFTER!
Part 1 - Hey boys and girls! Finally, a video series that takes the process of paint correction from the beginning to the end (from claying to waxing). Although I do not apply any wax at the end, I cover everything else in detail. This series is 1 hour and 54 minutes long so that should give you an idea as to how much detail I go into.
In this first video, I talk in detail about exactly what paint correction is. I also go into detail about the polishing technique you should use as well as the best product on the market that you should buy. I cover other topics too so just sit back and kick up your feet. This video is 15 minutes and 7 seconds long.
Part 2 - In this video, I go into detail about exactly what I use to remove the paint damage within this video series. I name and visually show every piece of equipment as well as all of the products necessary to do paint correction. In some cases, I even offer up a location where you can find the products that I use. I talk about why I chose to use the products that I use as well as what I don't use. If you want a list of these items, WATCH THIS VIDEO!


 Keep it country!


Comment