

 Tweet
Tweet
Pictures from Meguiar's July 13th, 2017 Thursday Night Open Garage
We started off tonight's TNOG with a history lesson from one of our regular attendants. These were some of the tools & products he used from I believe he said the 1960's! 600 grit sandpaper was all they had to color sand a car to help with the texture after it was painted. Old School sandpaper, machine & compounds. Can you say technology has come a long way?!


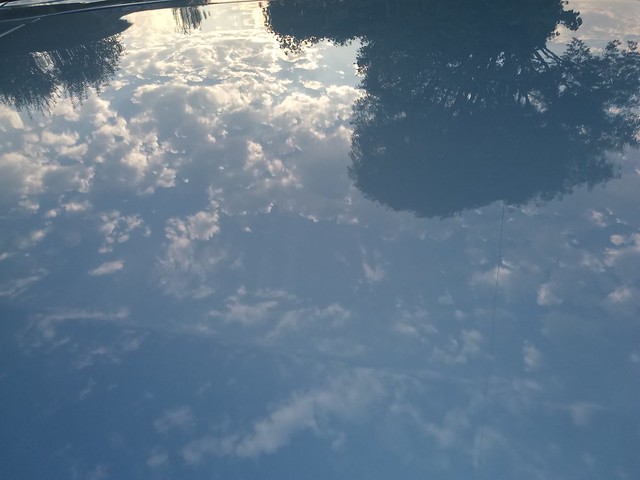
First project of the night was this 1965 Mustang which the owner has owned since high school! The owner was having some trouble getting the swirls & scratches out. We determined part of his trouble was the fact that it was so difficult to see the defects in this color paint! We ended up rolling it out into the sun a couple times to get a good look at the defects. If you have noticed, this is why we always say, multiple types of lighting sources is recommendation when evaluating for below surface defects and during your working process.


The car had been painted 15 years ago. We first wanted to point out to everyone viewing the project that we are seeing essentially two layers of defects. It is hard to tell in this picture, but there are some straight line sanding marks likely in the primer layer. Obviously these are not coming out but it is something we want to be conscious of because it can trick your eyes; when working it appeared they were in the clear coat layer.

Trying to look at the defects in the sun without being blinded by the light!

We first started with Ultimate Compound on our DFC5 Soft Buff DA Foam Cutting Disc, 4800 OPMs, 4 section passes, moderate pressure, moderate arm speed. This combination eliminated about 70% or so of the defects. The shallow swirls & scratches were gone, but the car had a pretty good amount of RIDS (random isolated deeper scratches) which were not coming out all that easy. The paint was pretty hard or "resilent" to our processes.
We then stepped up to M100 Pro Speed Compound on a clean DFC5 Soft Buff DA Foam Cutting Disc with similar technique to above. While this combination removed more defects, we still felt there was room for improvement.
We have found some paints really prefer our DA Microfiber Correction System discs. You may have heard of this technique, before, and just to clarify from a company standpoint we can't really stand behind or guarantee performance since the following combination was not designed & tested for this use, but in general, M205 Ultra Finishing Polish applied via our DMC or DMF DA Microfiber Finishing Discs on a random orbital dual action polisher has proven to cut very well and also finish very well at the same time. This technique was deployed for this paint primarily because the paint was quite hard & "resilient." Below Mike Stoops performs a test spot with M205 Ultra Finishing Polish via DMC5. This combination proved to remove all the defects to our satisfaction, leave the paint with a great high gloss, and greatly improve the clarity in the paint. We followed up with a coat of Ultimate Paste Wax.


The owner was a little excited we were able to help him determine a system which would work, so upon leaving he left us a little friendly burned rubber : )

Next up was a headlight restoration project on this Chrysler 300.


We started with our Heavy Duty Headlight Restoration Kit first step, the 1000 grit finishing disc by hand. While this combination worked well, and if we continued throughout the entire steps of the kit, it worked have worked fine but, there were some more room for improvement on the overall clarity of the light.

Since we had access to the proper tools and the experience level to perform some more advanced sanding processes, we pulled out the big guns and demonstrated Meguiar's Unigrit 800 dry sanding disc via pneumatic DA Polisher. Oh we also took the lights out of the car! It made it much easier to work on them. Teamwork.

After 800

After 1000 damp sanding via pneumatic DA Sander

And after 3000 grit

We then remove the sanding marks with our microfiber cutting disc & D300 DA Microfiber Correction Compound. Next we used M205 Ultra Finishing Polish via a DA Power System Yellow Polishing Pad.


Finally we used the new liquid wipe on coating included in our Heavy Duty Headlight Restoration Kit which has a ASTM certification for 1 years worth of protection from UV damage.

Santiago and his buddy Jesus worked together to complete the other headlight assembly.

And all done! The process takes a good amount of time to complete but it is worth it!


Last project of the night was this dark gray corvette which was full of Random Isolated Deep Scratches & stains from the previous owner. With the night getting late, we didn't a whole lot of time to work on the car, but had just enough to figure out what it was going to take.


M100 Pro Speed Compound via DMC5 DA Microfiber Cutting Disc & MT300 DA Polisher to the rescue. We didn't get a lot of before and after's from this project, but the combination, used on both 3 & 5 inch discs, proved to random deep scratches very efficiently, and left behind a high gloss finish with about zero haze in this metallic gray!


Even though the entire hood was not completed, we put a coat of Ultimate Paste Wax on via MT300 & 4 Inch DA Power System Waxing Pad so the owner wasn't rolling around unprotected.

Thanks to everyone for coming out!
We started off tonight's TNOG with a history lesson from one of our regular attendants. These were some of the tools & products he used from I believe he said the 1960's! 600 grit sandpaper was all they had to color sand a car to help with the texture after it was painted. Old School sandpaper, machine & compounds. Can you say technology has come a long way?!
First project of the night was this 1965 Mustang which the owner has owned since high school! The owner was having some trouble getting the swirls & scratches out. We determined part of his trouble was the fact that it was so difficult to see the defects in this color paint! We ended up rolling it out into the sun a couple times to get a good look at the defects. If you have noticed, this is why we always say, multiple types of lighting sources is recommendation when evaluating for below surface defects and during your working process.
The car had been painted 15 years ago. We first wanted to point out to everyone viewing the project that we are seeing essentially two layers of defects. It is hard to tell in this picture, but there are some straight line sanding marks likely in the primer layer. Obviously these are not coming out but it is something we want to be conscious of because it can trick your eyes; when working it appeared they were in the clear coat layer.
Trying to look at the defects in the sun without being blinded by the light!
We first started with Ultimate Compound on our DFC5 Soft Buff DA Foam Cutting Disc, 4800 OPMs, 4 section passes, moderate pressure, moderate arm speed. This combination eliminated about 70% or so of the defects. The shallow swirls & scratches were gone, but the car had a pretty good amount of RIDS (random isolated deeper scratches) which were not coming out all that easy. The paint was pretty hard or "resilent" to our processes.
We then stepped up to M100 Pro Speed Compound on a clean DFC5 Soft Buff DA Foam Cutting Disc with similar technique to above. While this combination removed more defects, we still felt there was room for improvement.
We have found some paints really prefer our DA Microfiber Correction System discs. You may have heard of this technique, before, and just to clarify from a company standpoint we can't really stand behind or guarantee performance since the following combination was not designed & tested for this use, but in general, M205 Ultra Finishing Polish applied via our DMC or DMF DA Microfiber Finishing Discs on a random orbital dual action polisher has proven to cut very well and also finish very well at the same time. This technique was deployed for this paint primarily because the paint was quite hard & "resilient." Below Mike Stoops performs a test spot with M205 Ultra Finishing Polish via DMC5. This combination proved to remove all the defects to our satisfaction, leave the paint with a great high gloss, and greatly improve the clarity in the paint. We followed up with a coat of Ultimate Paste Wax.
The owner was a little excited we were able to help him determine a system which would work, so upon leaving he left us a little friendly burned rubber : )
Next up was a headlight restoration project on this Chrysler 300.
We started with our Heavy Duty Headlight Restoration Kit first step, the 1000 grit finishing disc by hand. While this combination worked well, and if we continued throughout the entire steps of the kit, it worked have worked fine but, there were some more room for improvement on the overall clarity of the light.
Since we had access to the proper tools and the experience level to perform some more advanced sanding processes, we pulled out the big guns and demonstrated Meguiar's Unigrit 800 dry sanding disc via pneumatic DA Polisher. Oh we also took the lights out of the car! It made it much easier to work on them. Teamwork.
After 800
After 1000 damp sanding via pneumatic DA Sander
And after 3000 grit
We then remove the sanding marks with our microfiber cutting disc & D300 DA Microfiber Correction Compound. Next we used M205 Ultra Finishing Polish via a DA Power System Yellow Polishing Pad.
Finally we used the new liquid wipe on coating included in our Heavy Duty Headlight Restoration Kit which has a ASTM certification for 1 years worth of protection from UV damage.
Santiago and his buddy Jesus worked together to complete the other headlight assembly.
And all done! The process takes a good amount of time to complete but it is worth it!
Last project of the night was this dark gray corvette which was full of Random Isolated Deep Scratches & stains from the previous owner. With the night getting late, we didn't a whole lot of time to work on the car, but had just enough to figure out what it was going to take.
M100 Pro Speed Compound via DMC5 DA Microfiber Cutting Disc & MT300 DA Polisher to the rescue. We didn't get a lot of before and after's from this project, but the combination, used on both 3 & 5 inch discs, proved to random deep scratches very efficiently, and left behind a high gloss finish with about zero haze in this metallic gray!
Even though the entire hood was not completed, we put a coat of Ultimate Paste Wax on via MT300 & 4 Inch DA Power System Waxing Pad so the owner wasn't rolling around unprotected.
Thanks to everyone for coming out!
 [/IMG]
 [/IMG]


Comment